Publish a dataset into Browse
Calculations uploaded into the Create module are only accessible to registered ioChem-BD users, this will usually be comprised of a small group of individuals that conform the research group/center. Their calculations will not be accessible until they are published in the Browse module, the public module of ioChem-BD.
Before moving to the publication mechanism, it is interesting to read again the section about the organizational elements that conform each module: ioChem-BD organizative elements.
So published projects become Collections and published calculations become items on the Browse module, it is a mere grammatical change to align with DSpace software naming convention.
Once published, both elements are linkable, searchable and viewable publicly.
Publication requirements
To perform calculation publication, users must have defined (on Browse module) a community where to publish. The steps required to create a community and assign its administrator falls upon ioChem-BD's system administator and are described on publishing endpoints definition page.
Publication steps
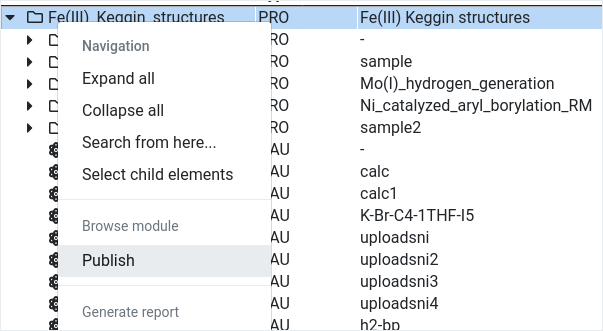
Select the elements to publish
On Create module, navigate to the project where the desired calculations reside.
Then you must select it and right click it, then choose Publish from the Browse module section of the context menu.
WARNING
Since ioChem-BD v3.0, you can only select and publish the entire project, not part of its content. You must select the project only prior publishing. If you select other content, the publish option will not be available.
If an error message appears at this point, please read the FAQ entry about no publishing community defined.
Publication form
After selecting the project and clicking "Publish", a streamlined publication form will appear. This form consolidates all publication settings into a single, easy-to-navigate interface.
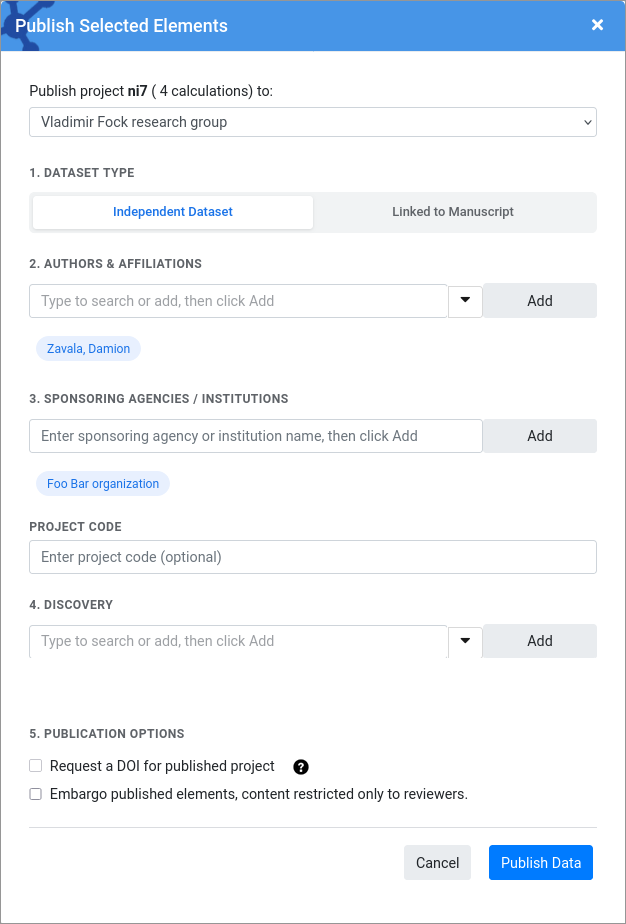
At the top of the form, you'll see a summary showing the project name and the number of calculations to be published. You must first select the destination community from the dropdown menu before the form fields become active.
TIP
If you have multiple communities available, select the appropriate one where you want your dataset to appear.
The publication form is organized into four numbered sections:
Section 1: Dataset Type
This section allows you to specify whether your dataset is independent or linked to a published manuscript.
- Independent Dataset: Select this option if your data is standalone and not associated with any publication.
- Linked to Manuscript: Select this option if your dataset is supplementary material for a published paper.
When "Linked to Manuscript" is selected, additional fields appear:
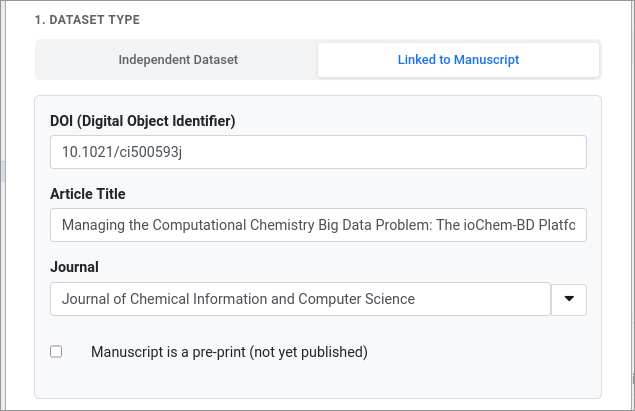
- DOI (Digital Object Identifier): Enter the DOI of the related manuscript (e.g.,
10.1021/acscatal.xxxxxx)- Article Title: Enter the title of the related paper
- Journal: Type to search and select the journal name
If the manuscript is not yet published, check the "Manuscript is a pre-print (not yet published)" checkbox. You can provide the paper information later once it is published.
Section 2: Authors & Affiliations
This section allows you to add authors and their institutional affiliations to your dataset.
Adding Authors:
- Type in the author search box to find existing platform users
- Click the Add button to add the selected author
- Authors appear as chips that can be removed by clicking the × icon
Adding Institutions:
- Type the institution name in the text field
- Click the Add button to add the institution
- Institutions appear as chips below the input field
TIP
The current user is automatically added as the first author. You can add external contributor names but only if they follow the format: Surname, Name, using a comma and a whitespace to separate both elements.
Section 3: Discovery
This section helps make your dataset more discoverable through keywords.
- Type a keyword in the search box (you can search existing terms or add new ones)
- Click the Add button to add the keyword
- Keywords appear as chips that can be removed by clicking the × icon
Adding relevant chemical and scientific terms will help other researchers find your published data through Browse module searches.
Section 4: Publication Options
This section provides additional options for your publication:
- Request a DOI for published project: When checked, a DOI (Digital Object Identifier) will be requested for your published collection. Once assigned, you will receive an email notification with the DOI.
- Embargo published elements: When checked, access to your published content will be restricted to reviewers only until you lift the embargo.
DOI Generation
DOI determination can take some minutes to resolve because it requires contacting third party services (CrossRef). Once the DOI has been assigned, you will receive an email with the DOI for the published collection.
You can read more about the embargo feature on the following pages:
Publishing the data
Once all sections have been filled, click the Publish Data button at the bottom of the form. The publication process will begin, and a progress indicator will show the status.
Publication resume
After the publication process completes successfully, a resume window will appear showing the results:

The resume displays:
- A success message with the project name
- Badges showing the number of calculations published and DOI request status
The resume is organized into three sections:
View Published Project : Contains a link to view your newly published collection on the Browse module. Click the View button to open the published collection in a new tab.
Peer Review Access (only visible if embargo was enabled) : If you enabled the embargo option, this section provides a shareable reviewer link. Click Copy to copy the link to your clipboard and share it with reviewers who need access to the embargoed content.

Project Management : Contains a link to the collection editor where you can modify properties or lift the embargo. Click Open Editor to access the Browse collection management page.
TIP
All administrative actions and links shown in the resume can be accessed anytime by clicking on the edit icon placed on the right side of each published collection in the Create module.
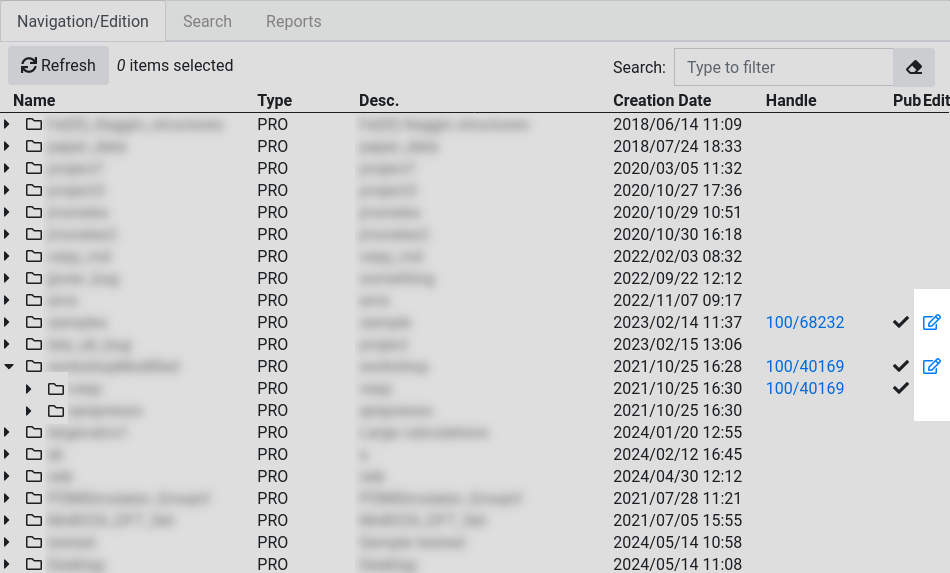
Published elements manipulation
In the navigation frame, published elements will display a green tick on the right side.
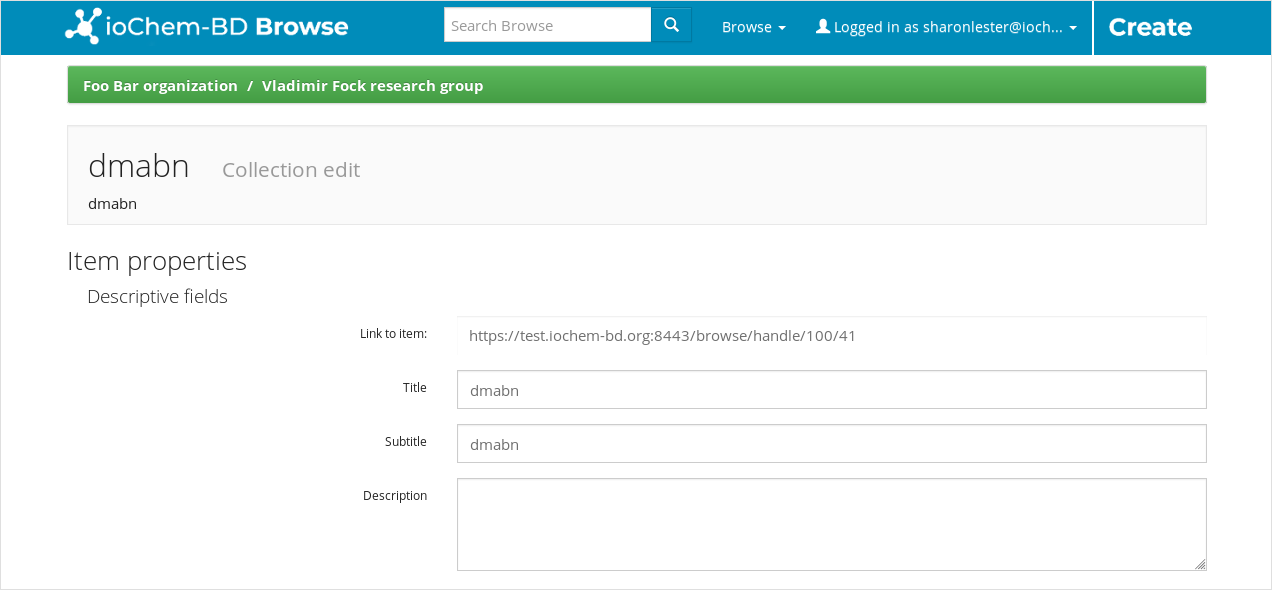
Published projects and subprojects will also have an additional black tick that points to the Browse Collection edit page.
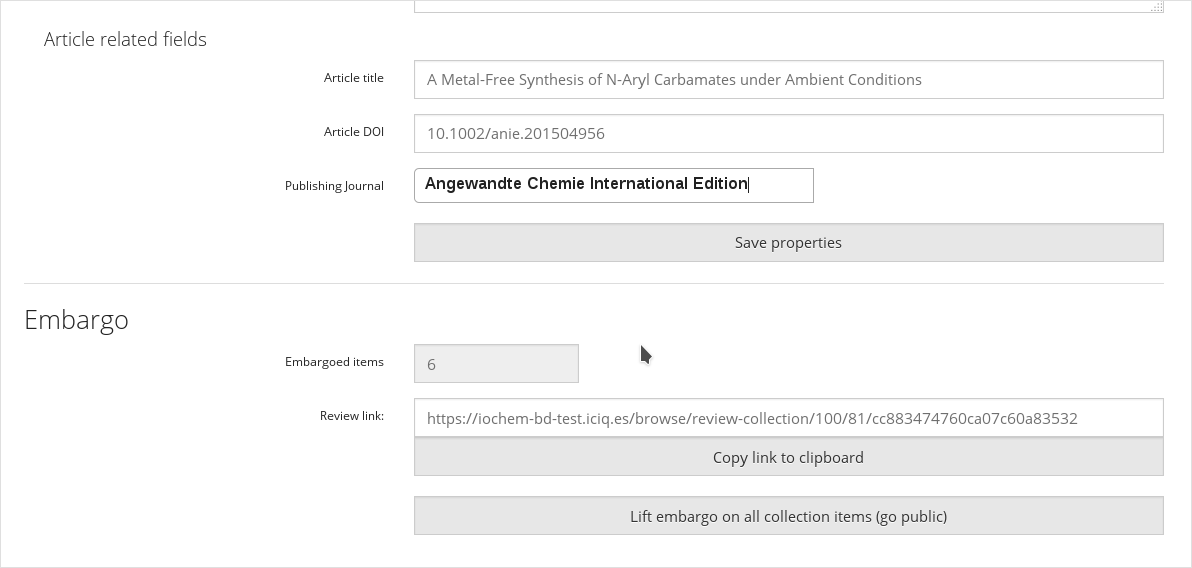
This page allows to:
- Change published collection name
- Set related article information
- Lift embargo
- Copy reviewers link
On the page that shows, the first section allows to change title, subtitle and description of the published collection:
The next section allows set publisher metadata and embargo options:
View published elements from Create
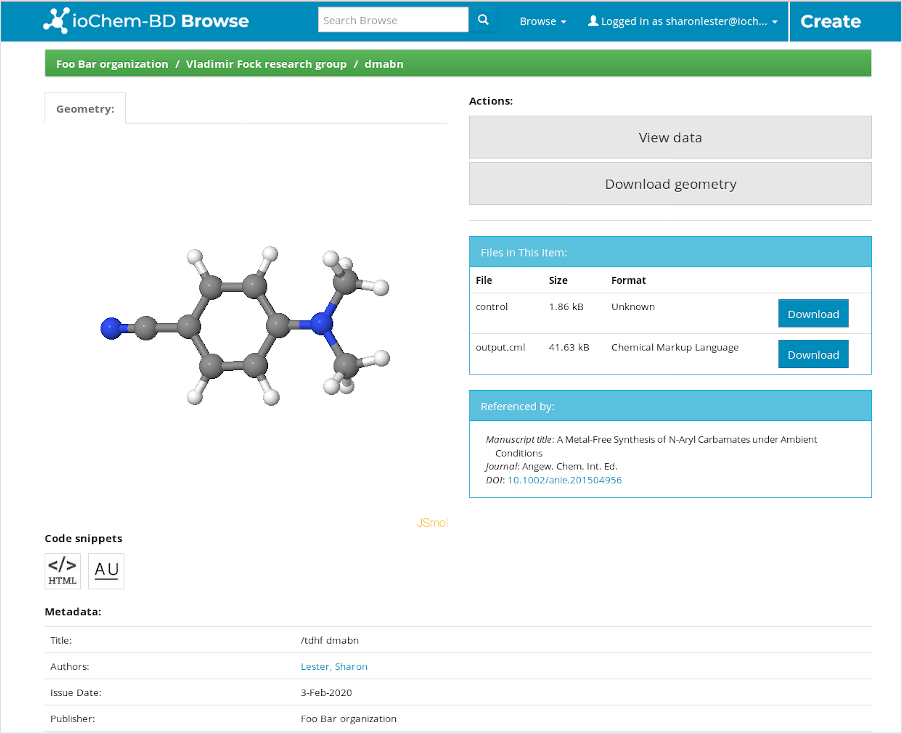
The projects and calculations published have a handle and a green tick on its right side.
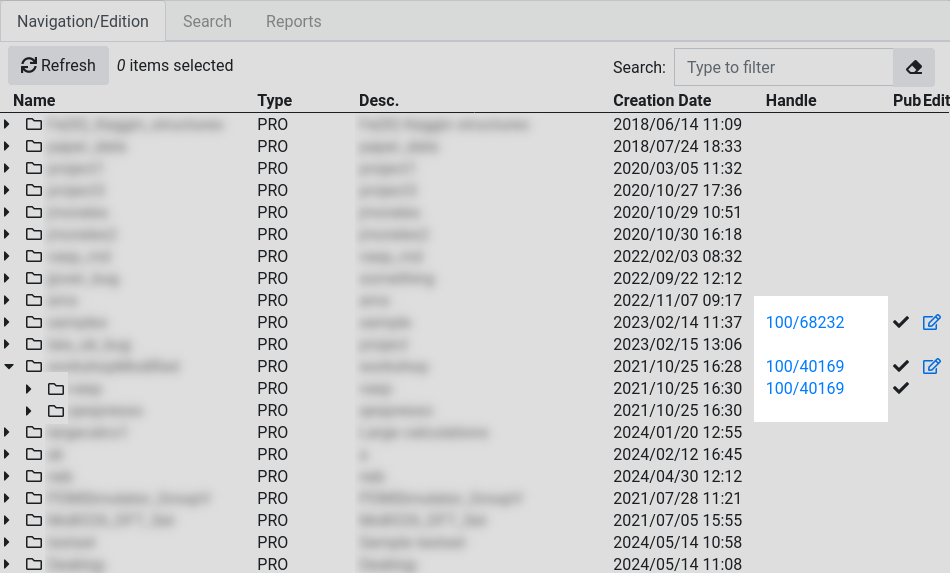
Clicking on the handle link will navigate to the published Browse content. Each collection can hold multiple Items (calculations) inside.
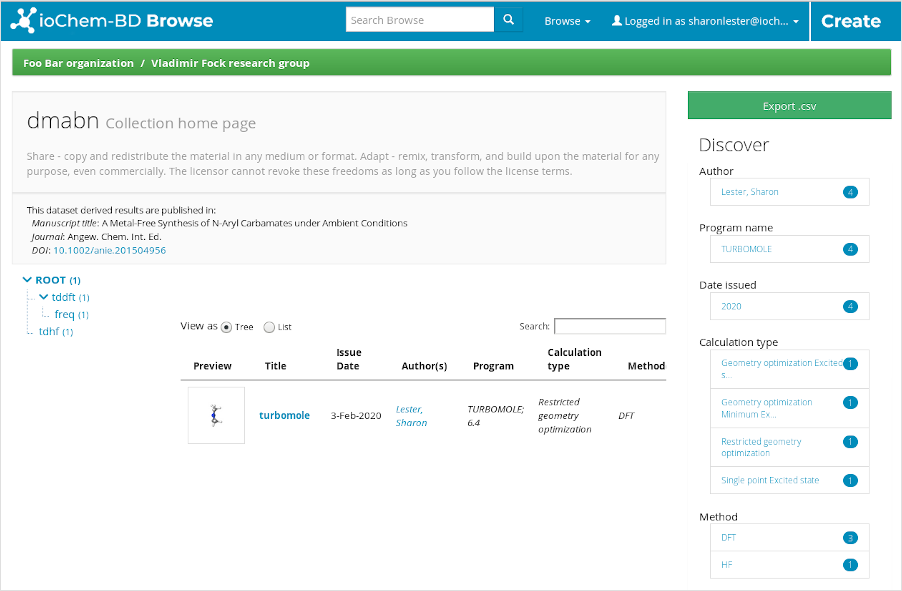
Each published item displays the uploaded input file, an output converted CML file, additional files and its metadata.