
Create module walkthrough
The Create module is a single-page web application aimed at managing input and output files from computational chemistry research work, and to generate derived content from it. Create allows uploading, organizing, visualizing and curating your data, and sharing it with your project mates.
Logging in
Create and Browse share a centralized sign-on service: when you open /create you are redirected to the ioChem-BD login page, and after a successful login you can move between both modules without signing in again. Use the Log out option in the user menu (described below) to end your session for the whole platform.
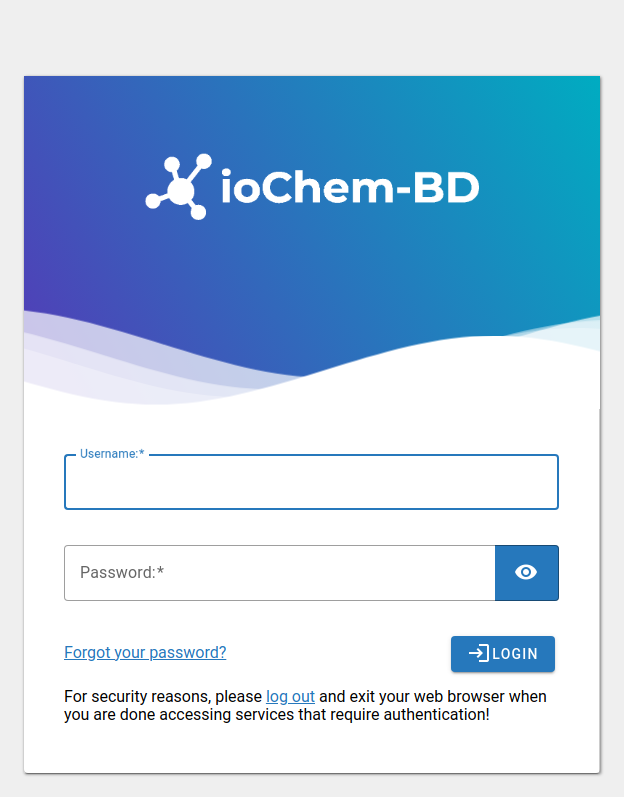
The main window
The window is composed of three frames:
- The main frame, with the operating modes as tabs: My workspace, Collaborate, Supervise, Search and Reports
- The Item Actions frame, showing the available views of the selected element
- The Item Details frame, showing the administrative metadata of the selected element
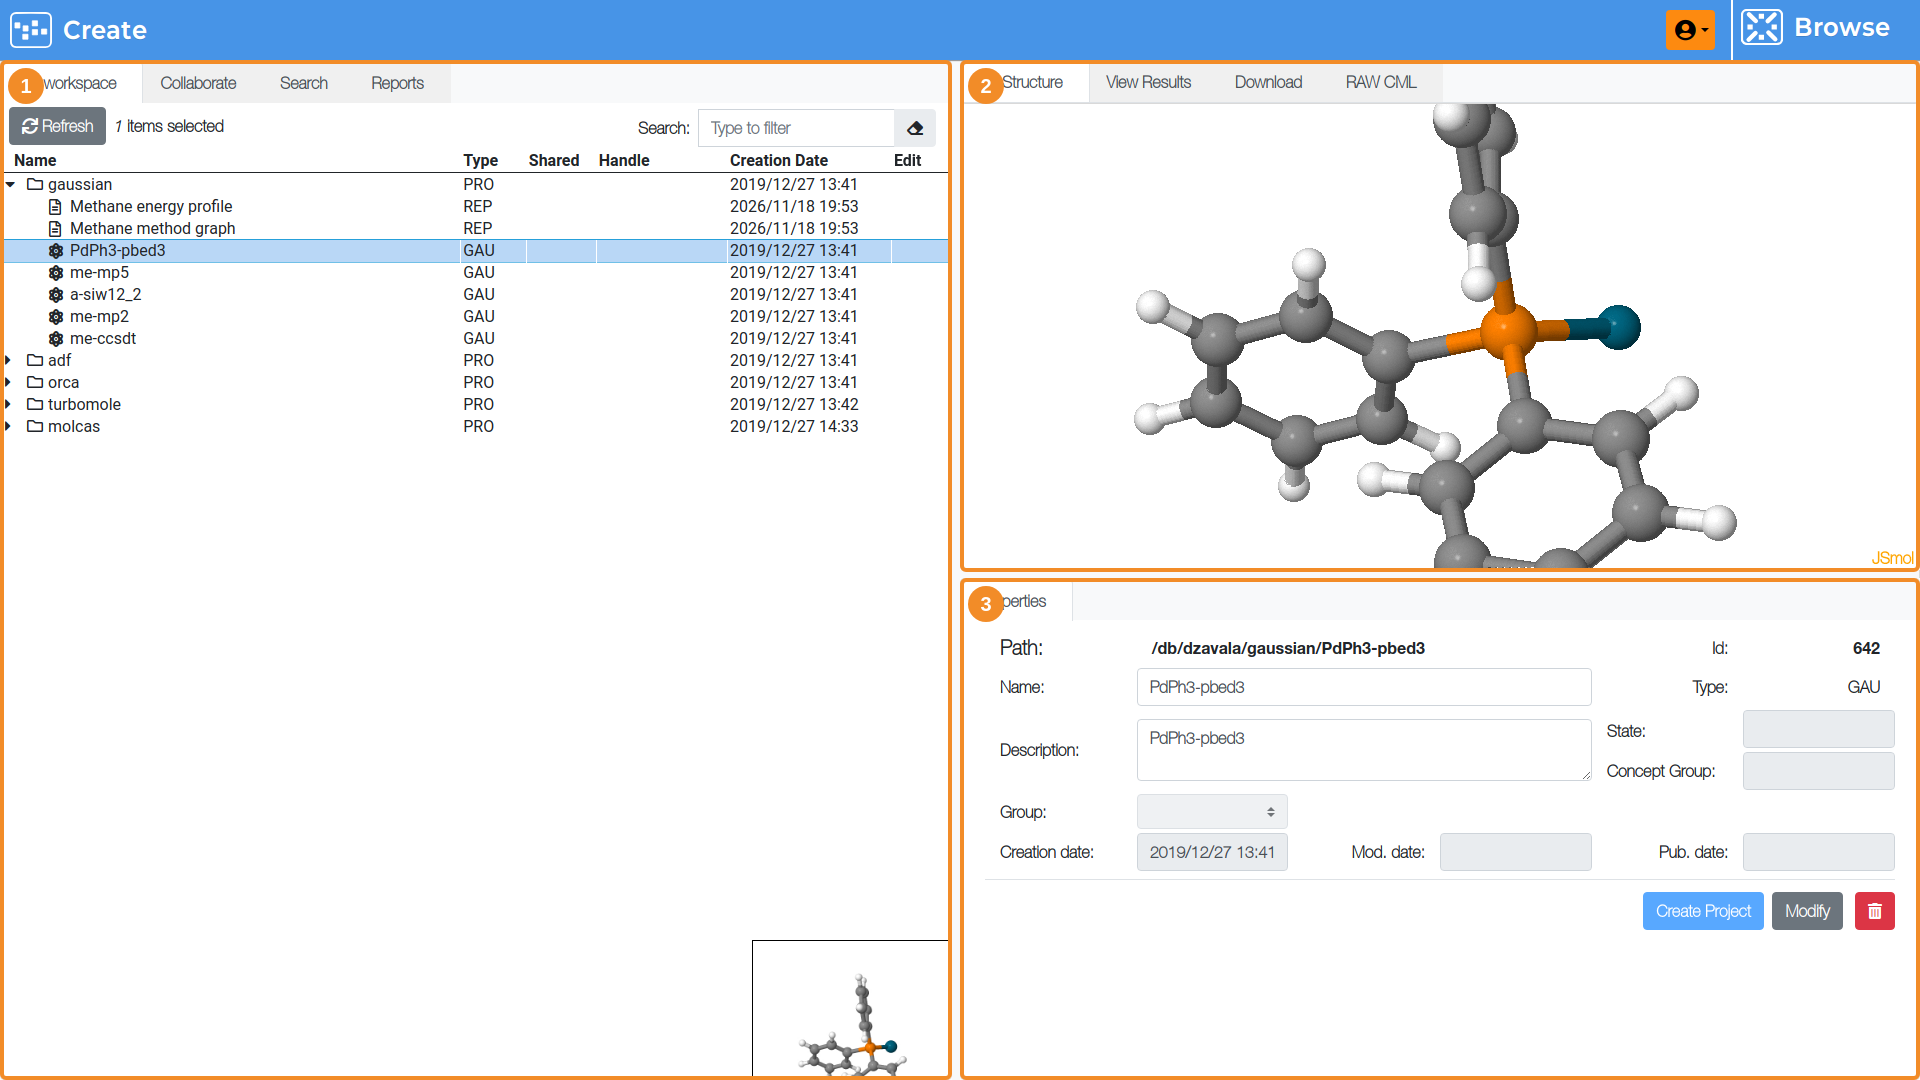

The Supervise tab only appears if you are a supervisor of other user accounts; the remaining tabs are always available.
The default operation flow within the Create module starts by navigating your uploaded content in the My workspace tab and selecting one element to display its content. When any element is selected, both the Item Actions frame and the Item Details frame refresh and display additional data.
Multiple element selection is allowed; it is normally associated with global operations, such as publishing a project or generating reports. Multiple element selection disables the Item Actions and Item Details frames. The selection counter next to the Refresh button shows how many elements are currently selected.
The top bar and user menu
The bar on top of the window gives access to your account and to the Browse module:
- The Browse shortcut on the right opens the Browse module in the same session.
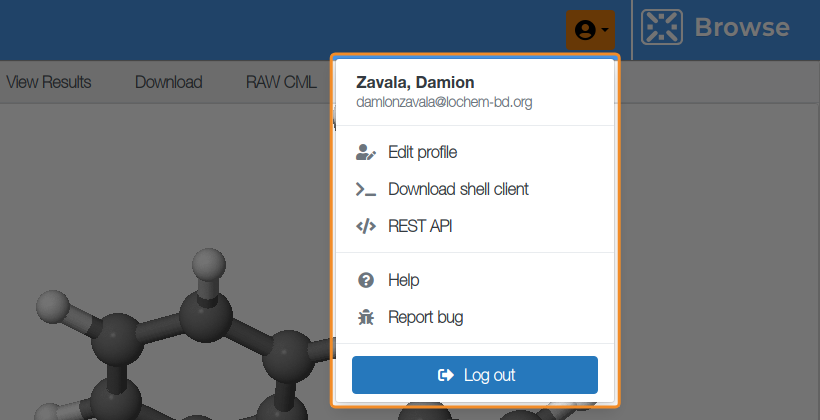
- The user icon opens a dropdown with your account name and e-mail, and these options: Edit profile (your Browse profile), Download shell client, REST API, Help and Report bug, plus the Log out button.
TIP
The Download shell client option generates a personal shell client package, preconfigured with your account details, that you can use to upload calculations from Linux terminals. Read more at Using the shell client.
My workspace tab
This tab is the entry point of all managing functionalities of the Create module. It displays a navigation tree composed of nodes and leaves: your workspace.
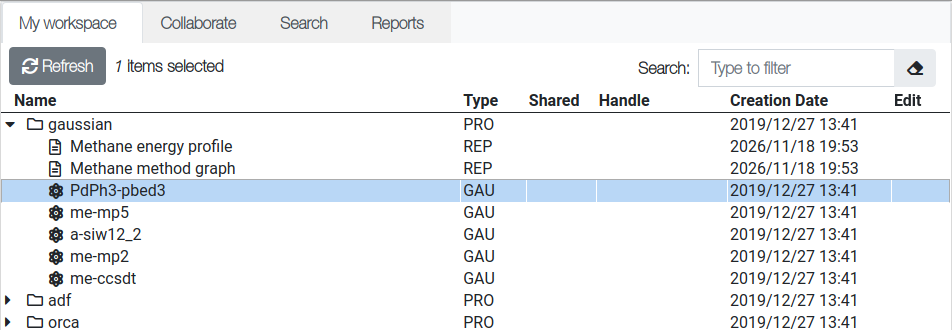
Each node represents what we call a project. This is just a container element, like a folder, and can contain other subprojects or a set of single calculations, which are the basic elements of your data.
A calculation usually contains input files, CML converted output files, additional files, etc. The My workspace tab is the place to gather projects and calculations and organize your data sets the way you want to eventually publish them.
Above the tree, the toolbar provides a Refresh button, the selection counter and a Type to filter box that hides tree rows not matching the typed text.
Tree columns
- Name: Element name (projects, calculations and reports).
- Type: Element type code, see the table below. Projects are labeled as PRO.
- Shared: Indicates that the element is shared with other users.
- Handle: Unique identifier of each published element, which can be accessed from the Browse module (see Publish data to Browse).
- Creation Date: When the element was added to Create.
- Edit: Shortcut to edit elements that are already published in the Browse module.
On calculations, the Type column contains the abbreviation of the original software package used:
| Code | Software package |
|---|---|
| ADF | ADF |
| AMS | Amsterdam Modeling Suite |
| AMB | Amber |
| CAS | CASTEP |
| CP2 | CP2K |
| GAU | Gaussian |
| GMC | GROMACS |
| GRO | GronOR |
| GRRM | GRRM |
| LAM | LAMMPS |
| MOL | Molcas |
| MOP | Mopac |
| ORC | Orca |
| QEX | Quantum ESPRESSO |
| SIE | SIESTA |
| TML | Turbomole |
| UMA | UMA universal machine-learning potentials |
| VSP | Vienna Ab initio Simulation Package |
| XTB | xTB |
This list grows as more calculation types are implemented; check the Feature matrix for the current coverage.
Elements of type REP are reports generated inside Create, such as supporting information documents or reaction energy profiles; read the Generating reports page to learn how to create them.
Context menu
A context menu helps you with repetitive actions. Select any element in the workspace with a left click and then right click on it to see the available options:
- Expand all / Collapse all: Open or close the whole subtree.
- Search from here...: Opens the Search tab with the element path as starting point.
- Select child elements: Adds all child elements of the element to the current selection.
- Share: Opens the share dialog for the selected project.
- New asset...: Uploads a new asset (project documents, RMMD, JSON data) attached to the selected project.
- Browse module → Publish: Starts the publication of the selected elements to the Browse module.
- Generate report: Creates a Supporting Information, Reaction Energy Profile or Reaction Graph report from the selected calculations.
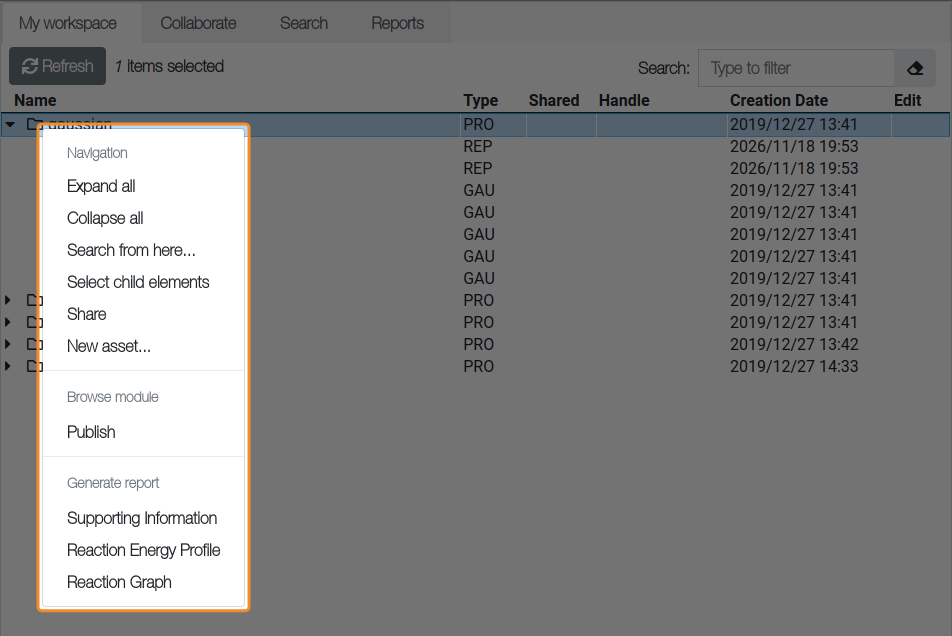
Read the Publish data to Browse section or the Generating reports section to learn how to proceed further.
Collaborate tab
The Collaborate tab displays all projects that other users have shared with you, enabling teamwork on computational chemistry research.
Working with shared projects is similar to working with your own projects: select any shared element to display its content in the Item Actions and Item Details frames. Depending on your permissions you can view, modify or even publish shared content.
For detailed information about sharing projects and managing permissions, please refer to the Collaborate feature documentation.
Supervise tab
The Supervise tab appears for supervisor accounts and displays the workspaces of supervised users as a separate tree, so supervisors can organize, curate and publish data on behalf of their research group members.
Refer to the Supervise users documentation for the complete workflow.
Search tab
The Search tab displays a form where you can query all uploaded projects and calculations. Multiple filters are available:
Type: Search for Project or Calculation elements.
Calculation type: Restrict results to one software package.
Name and Description: Partial text or regular expression matching.
Geometry: Search by chemical structure using a SMILES, InChI or InChIKey formula, with three matching modes:
- Contains: The query structure appears anywhere in the molecule.
- Exact: The molecule matches the query formula exactly.
- Similar: Molecules similar to the query one.
The Draw button opens a molecular structure editor to draw the query molecule.
Elements: Pick chemical elements from a periodic table that must be present in the molecule.
Path: Starting path to search for, see path definition.
Owner and Group: Who created the element and which group owns it.
Creation dates: Elements created between two dates.
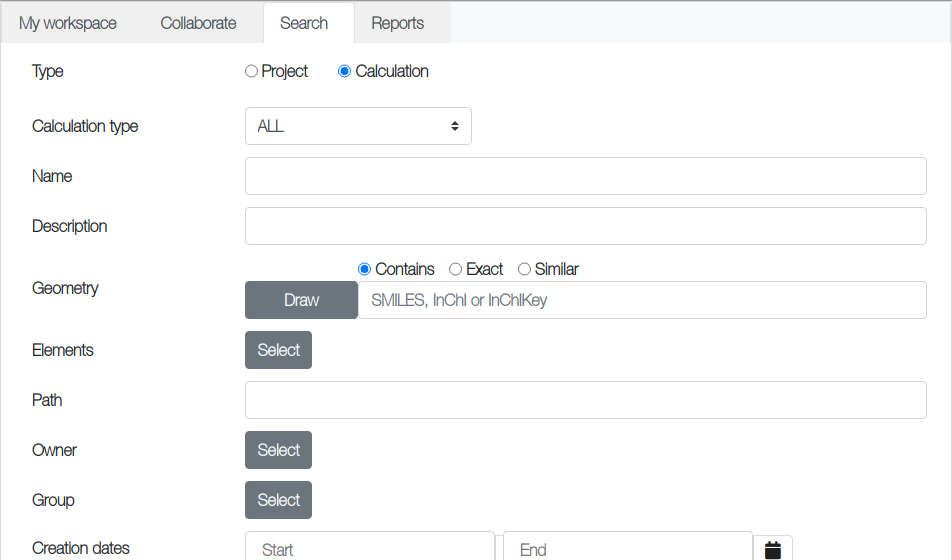
After setting the search parameters you want, click the Search button to perform the query. The list of results replaces the form; click any listed element to display its particular Item Actions and Item Details. To perform a new query, press New search to go back to the form.
TIP
Enriching the Description field with meaningful information will allow you to look for those concepts when performing a search.
Reports tab
This tab activates advanced operations to process sets of calculations and generate reports. This mode is fully described in the Generating reports page.
Item Actions frame
This frame displays all views available for the element selected in the My workspace or Search trees. Before any selection it shows the welcome panel. Projects show the Calculation upload and Asset upload forms (see Using the web interface), and calculations expose the following views, accessible as tabs:
3D structure
This view displays the molecular structure or simulation cell using JSmol (the JavaScript version of Jmol). In the case of geometry optimization runs, it shows the final geometry.
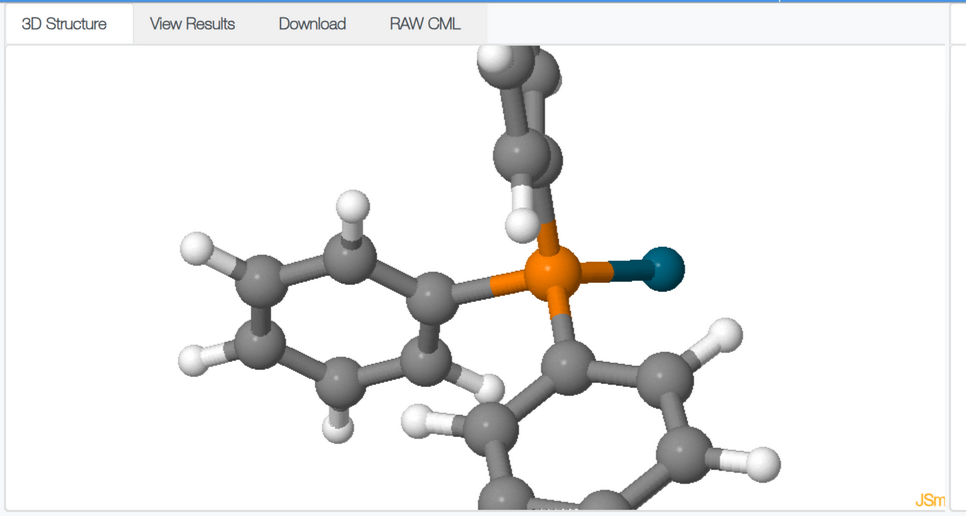
Calculations that include Molden files add two extra tabs inside this view:
- Geometry: Displays every geometry step available in the calculation, one file per optimization step.
- Orbitals: Visualizes molecular orbitals rendered from the Molden file.
Common JSmol operations:
- Hold left click + drag: Rotate molecule.
- Central button scroll: Zoom in / out.
- Hold Shift + double click + drag: Translate molecule.
- Right click: Display the JSmol options menu.
View results
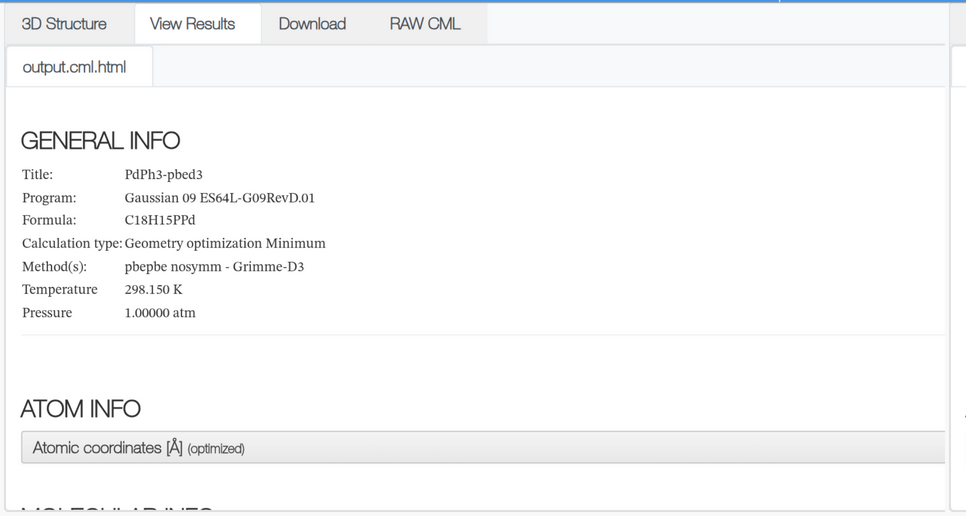
Some results of the output file uploaded to ioChem-BD are translated into CML (Chemical Markup Language), an XML language oriented to chemistry. Such markup language allows easy further conversion into any existing format, such as an HTML5 report, a PDF file or a JSON file.
Selected data is visualized, normally organized by content:
- General info: Calculation administrative and descriptive metadata such as user name, calculation type or methods used.
- Settings: (VASP only) most relevant INCAR settings.
- Atom info: Atom type, coordinates and basis used. Eventually cell parameters, lattice vectors and atom valence.
- Molecular info: Implicit solvation parameters, charge and multiplicity.
- Job: Its content varies depending on the quantum chemistry package used to generate the calculation. For calculations with multiple jobs this section appears more than once.
There is an exhaustive description of which fields are captured and how they are visualized in the From Codes to HTML5 report section of the Data model documentation.
Download
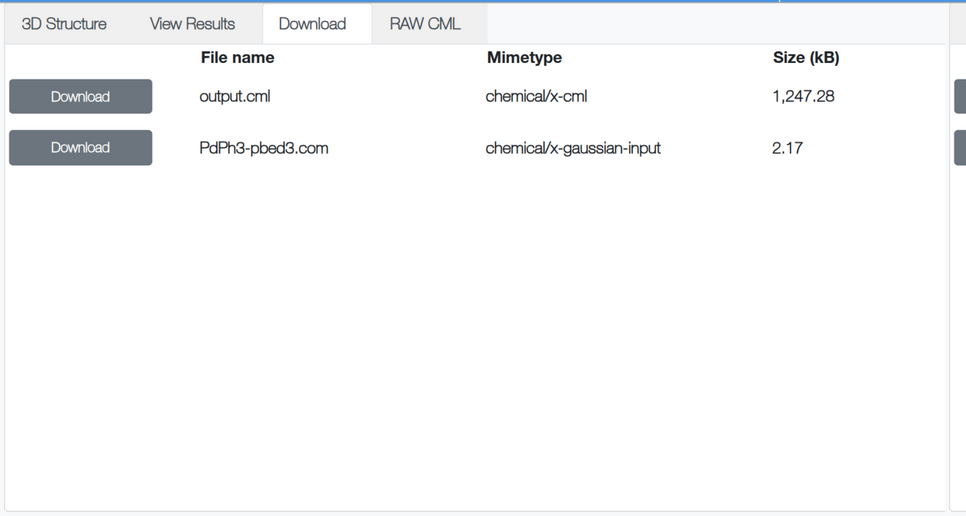
This view allows downloading the calculation files to your local filesystem.
RAW view
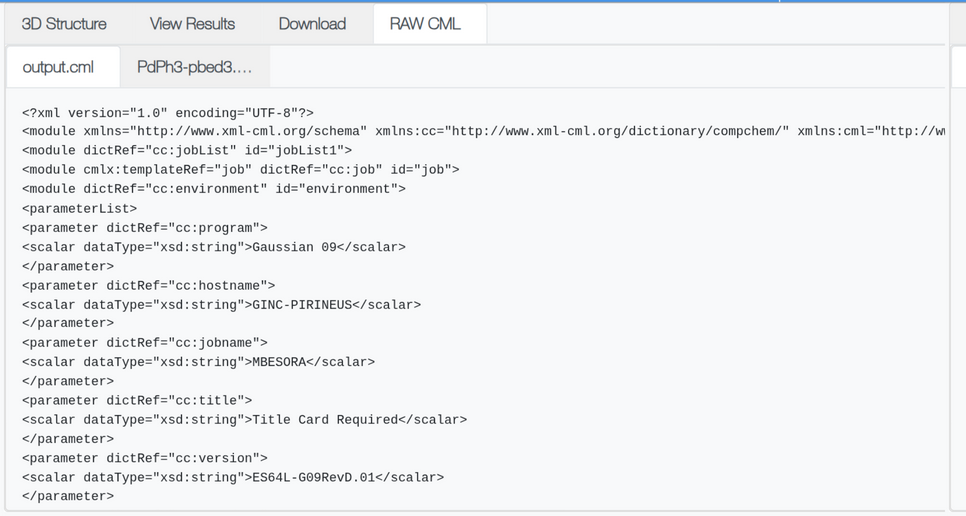
This view displays the content of the calculation files inside a text area, one tab per file. On large files, it starts to download the file instead of displaying it.
Item Details frame
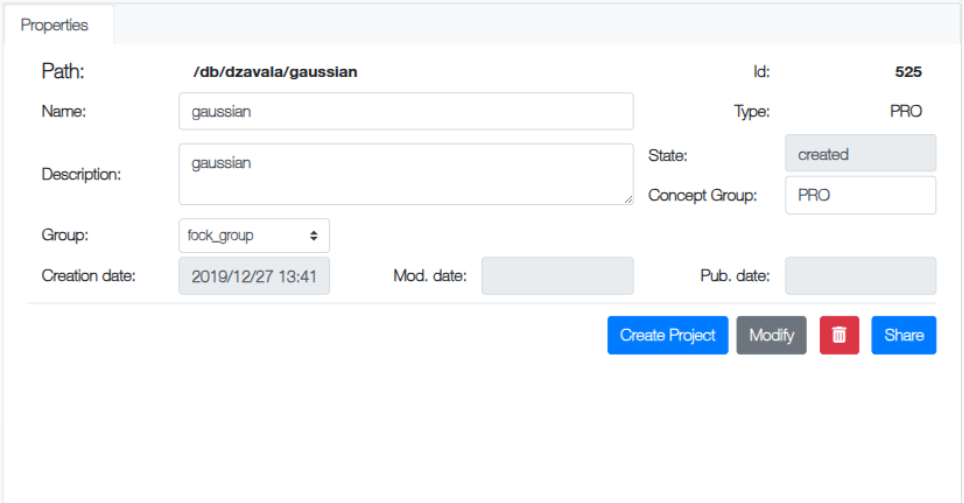
Any project or calculation selected in the workspace immediately refreshes this form, displaying its administrative metadata. Some fields are modifiable, e.g. name, description, concept group, owner group and assigned permissions. Others are fixed, like the path, the owner user or the creation date.
In the lower area of this frame four buttons provide important actions:
- Create Project: Generates a project in the current path using the values in the form.
- Modify: Replaces stored values for the selected element with the values in the form.
- Remove: Deletes the selected element.
- Share: Opens the sharing dialog to share the selected project with other users.
Upload bar
While uploading calculations via the web interface, a progress bar appears at the bottom of this frame, showing the progress of the uploading step. The Using the web interface page describes the upload procedure in detail.